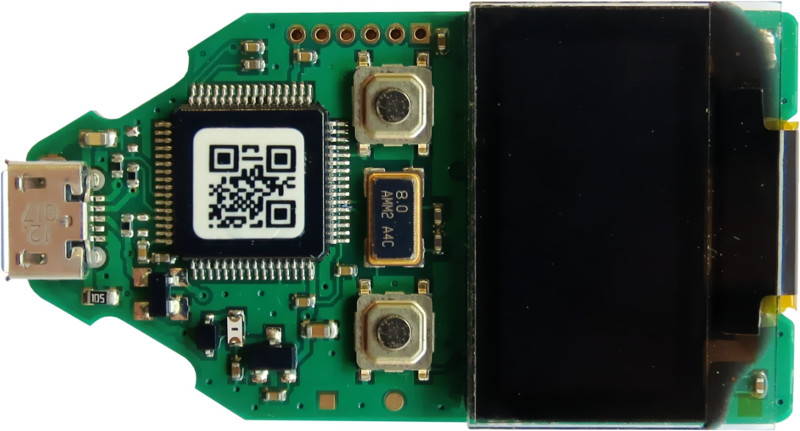
Building Your Own Trezor Hardware Wallet - Part 1

Recently I’ve been looking at purchasing a hardware wallet for storing and securing cryptocurrencies. Many people vouch for hardware wallets, especially if you have invested thousands of dollars into acquiring various cryptocurrencies.
At the moment, there are actually not that many commercially available hardware wallets to choose from. If you focus on only the brands with an established reputation within the crypto community, the only ones that I know of and would trust are Trezor, Ledger, and KeepKey.
The street price for a hardware wallet can range from about $60 to $120 USD, and if you’re Canadian prices are as high as $250 CAD due to exchange rate and high demand. That’s when I also noticed that the Trezor hardware wallet is open source, both firmware and hardware! I think I can do a bit better than $250 CAD and assemble my own Trezor from scratch.
Trezor open source
Trezor provides their firmware source code, hardware schematics and board layouts for free in git repositories hosted on Github. Instructions on how to build the Trezor firmware are also found on their git repo. As for the Trezor hardware, board layouts are provided as Eagle .brd files and the schematics provided as Eagle .sch files. A bill of materials (BOM) is provided as a simple plain text file. At the time of this writing, the Trezor hardware is on revision 1.1, although the older revision 1.0 is still available on their git repo.
Fixing the BOM
The first step was to create an updated and better BOM. The one provided by Trezor just barely passable and contained links to Czech electronics sites and one was a dead link. I also noticed after looking at the schematics that the BOM did not contain any of the newer parts used in revision 1.1; it only had the parts for revision 1.0. It appears that revision 1.1 adds some reverse voltage protection and a fuse for the USB port and also adds series termination resistors for the USB data lines as per the USB specification.
I will instead create a BOM as a csv file with part numbers from Digikey’s vast catalog of electronic components so that it could be imported using Digikey’s upload-to-cart tool. For this I had to do some searching in Digikey’s catalog as well as general web searches to find equivalent parts. Part numbers for specific ICs were given, but for all of the passive components only a brief description was provided. I was able to determine the part numbers for the newer ICs and passives found in revision 1.1 by copying them off of the v1.1 schematic.
A copy of this modified BOM can be downloaded here.
Sourcing the OLED display

The only part that gave me a bit of trouble was the 128x64 resolution OLED display.
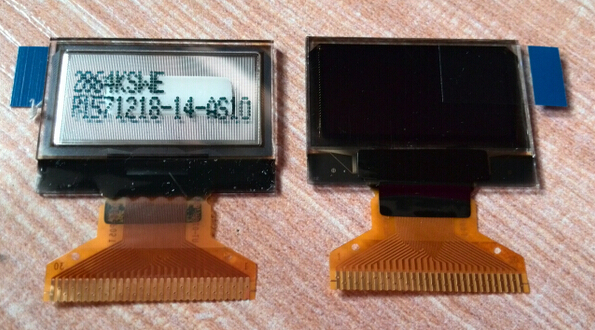
Trezor gives a part number of UG-2864HSWEG01 which I was only able to find from two places online: from futureelectronics.com with a minimum quantity of 5 at $4.15 USD each ($20.75 total), and the other from Adafuit sold as a complete module for $19.50 USD.
I also learned that the UG-2864HSWEG01 comes in two flavours, one with a 0.96” screen and one with a 1.3” screen.
Both are identical in every way except for the physical screen size, even the resolution remains the same at 128x64.
The Trezor uses the 0.96” screen version.
The only place I found the larger 1.3” screen version was on Adafuit, also sold as a complete module for roughly the same price as the smaller 0.96” version.
One thing to consider if choosing the Adafruit model is that you’d have to first desolder the OLED display from the rest of the module before you could use it on the Trezor PCB. For this reason, I opted to go with the five pack from futureelectronics to save me having to desolder the display and also so that I’d have a backup as well as allowing me to assemble more than just one Trezor.
With the new BOM finished and updated for revision 1.1, the cost for the components came to under $42 CAD for the Digikey order (shipping included) plus $20.75 USD for the five OLED displays. In all, less than the equivalent of $70 CAD for all the electronic components. Keep in mind that if you were to assemble more than just one, the per unit cost would be lowered as well.
Fabricating the PCB
To create the PCB for the Trezor we’ll use one of the cheap PCB manufacturing services available online. If you’re not pressed for time and if your PCB design isn’t too complex, you can order boards for as little as $5 USD for a quantity of 10 boards! You typically end up spending much more for shipping than you do for the actual board manufacturing cost. Most of these PCB manufacturing services are located in China which also means that to receive them in North America you’re looking at an average turn-around time of 2 to 3 weeks.
We can use the .brd files provided and convert them to Gerber format which is a format that all PCB manufacturing services will accept. Then it’s just a matter of uploading the Gerber files and placing an order to have the PCB made and waiting.
I’ll likely end up choosing Seeedstudio Fusion PCB because it’s super cheap and the quality is actually quite good. Only downside is the long turn-around time, but I’m in no real rush.